eastbaydiy ownership guide
Product Technical Sheets
Setup, adjustment, safety, and care notes for long-term ownership of your handmade furniture.
Most common topics
Anchoring kits, leg leveling, drawer slides, and Rubio Monocoat care.
Overview
Ownership guide
Every eastbaydiy piece is handcrafted using solid hardwood lumber & hardwood plywood and premium hardware. Product technical sheets help document the key parts, hardware systems, and service details for long-term ownership.
Each sheet may include hardware specs, replacement part details, adjustment guidance, material notes, and care information.
Anchoring Kit Installation
Safety
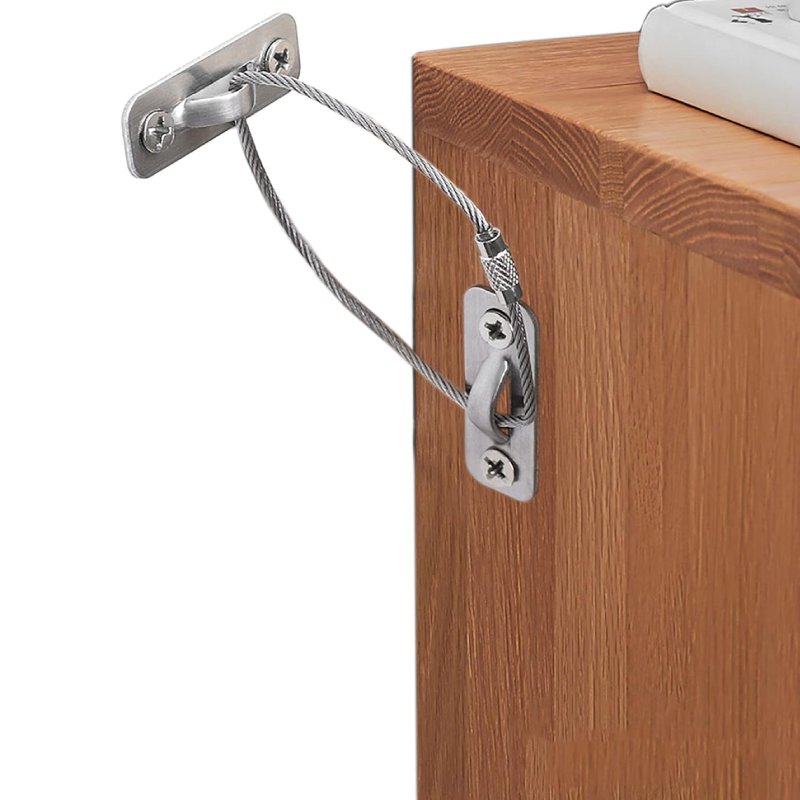
To reduce the risk of tip-over injuries and deaths to children, please install a wall anchoring kit. Contact us below to request a free wall anchoring kit for our furniture that are 27 inches or taller. Read full safety policy.
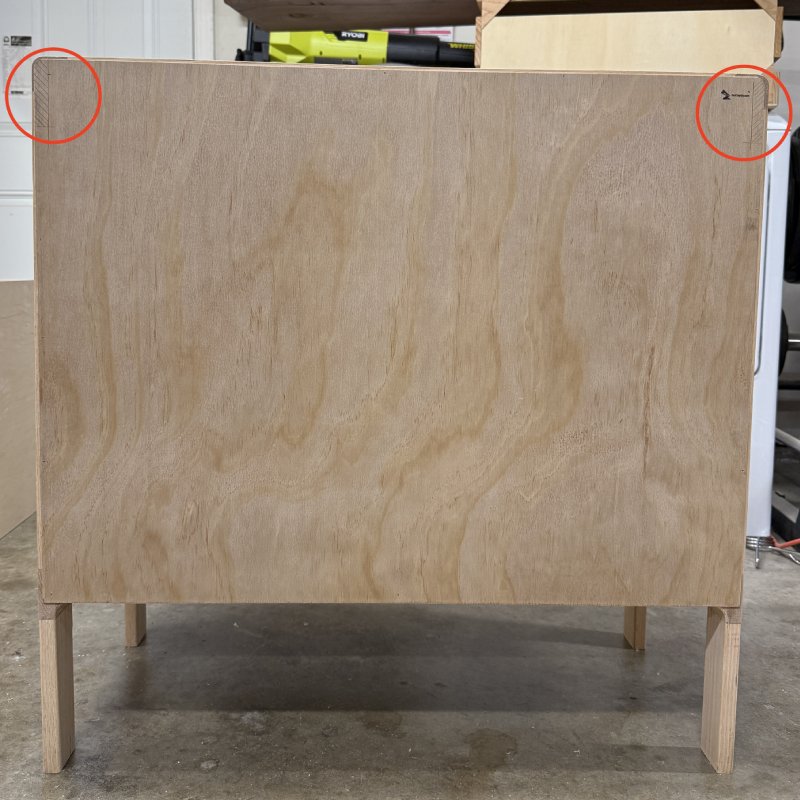
- Move the furniture away from the wall and locate the two anchor points near the top back corners as shown in the photo. Install anchors on both sides.
- Place the furniture in position and mark the wall where the straps meet the wall.
- Drill pilot holes and install the screws into wall studs if possible (or use wall anchors).
- Attach the straps to the top back of the furniture near each corner.
- Connect the straps to the wall screws and tighten so the furniture sits firmly against the wall.
Important:
Both anchors must be installed near the top of the furniture and on both sides to prevent tipping. Installing only one side will not provide proper protection.

Leg Installation / Adjustment
Setup
For transportation and delivery safety, legs may be removed or loosened before the piece arrives. This helps prevent damage to both the furniture and surrounding areas during moving.
For our in-house legs, most eastbaydiy pieces use threaded hanger bolts and/or mounting plates, so reinstalling the legs is simple. (Bring Your Own Legs follow your hardware's own attachment method.)
Our pieces are designed to sit flush on level floors. If you notice any wobbling, we recommend first moving the piece to a different spot to see if the floor is more even.
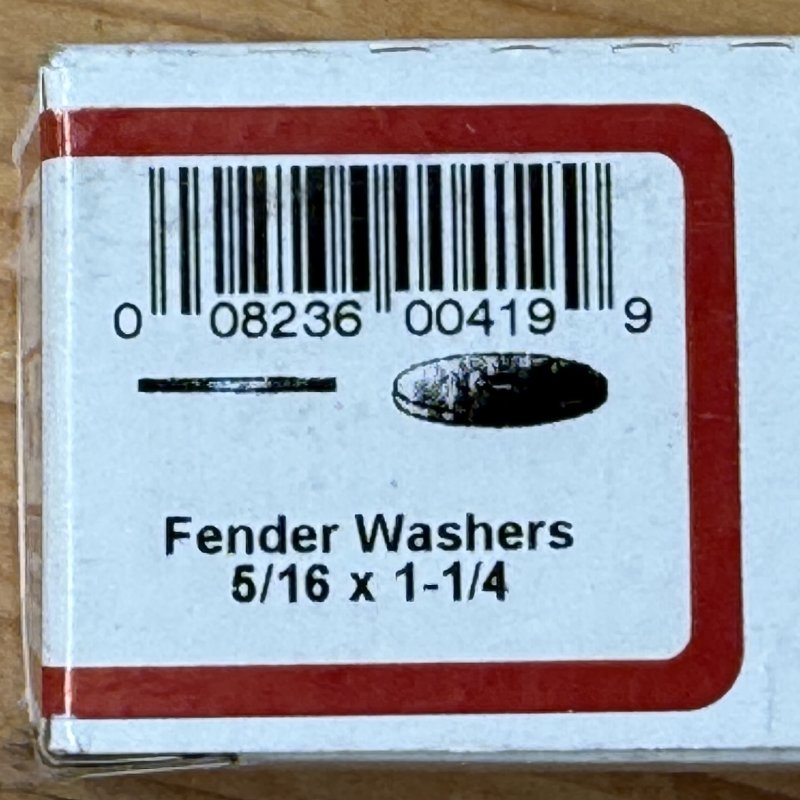
If the floor remains uneven and the piece wobbles, you can easily stabilize it by adding fender washers (5/16" x 1-1/4") to one or more legs. Here's how:
- Unscrew the leg(s) where adjustment is needed.
- Place one fender washer between the leg and the base, then screw the leg back in.
- Test for stability. If it still wobbles, add an additional washer as needed.
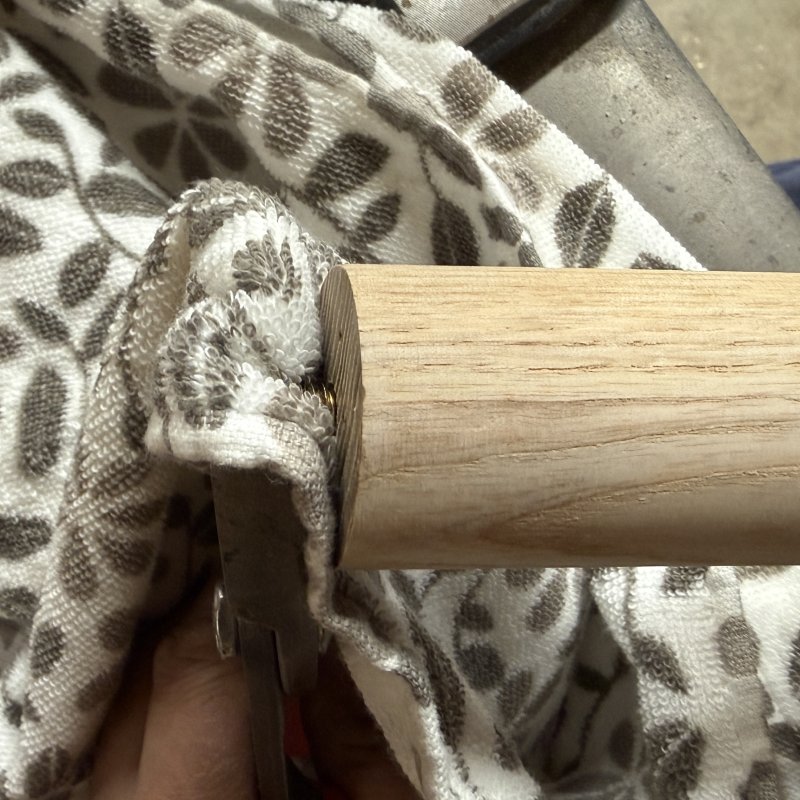
- If more spacing is needed, slightly unscrew the hanger bolt to expose more threads. Use pliers with a cloth to protect the bolt. This allows additional washers to be added.
This method applies to all pieces with screw-on legs and helps ensure proper balance on uneven flooring.

Slides Adjustment
Hardware
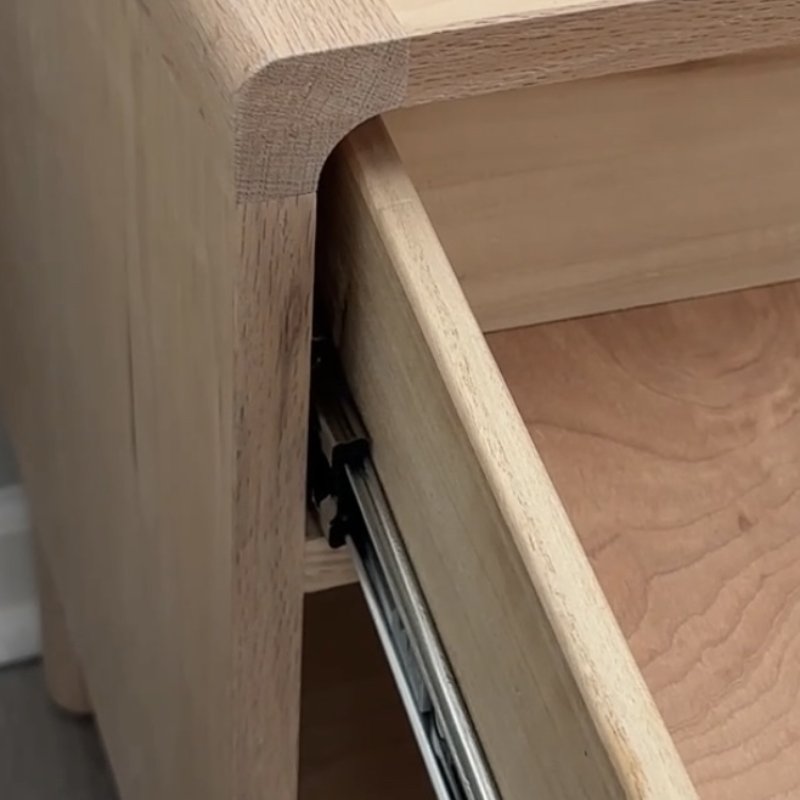
For transportation and delivery safety, we often remove drawers from the cabinet body. If you prefer to insert the drawers yourself, follow these steps to ensure smooth and proper soft-close function.
For side-mount soft-close slides, follow the step-by-step guide for side-mount soft-close slides
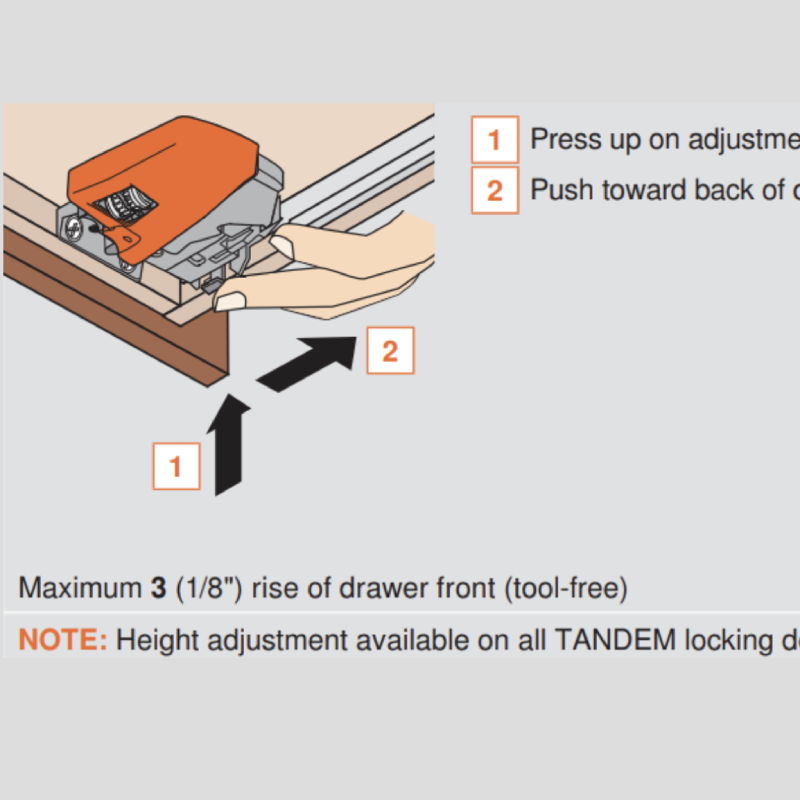
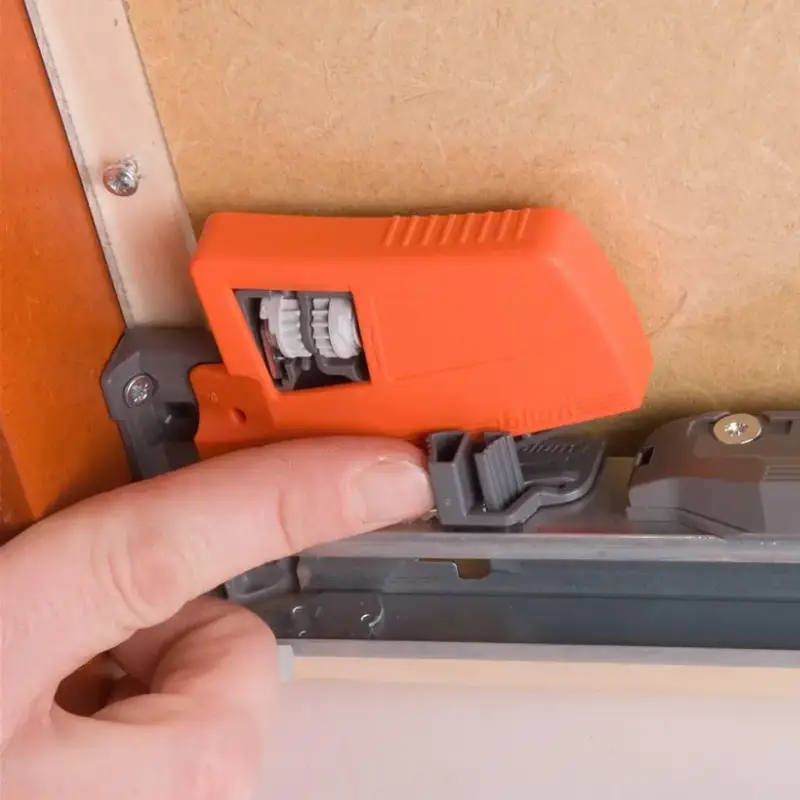
For Blum Tandem / Movento, just Google the instruction and you will find plenty of resources on YouTube.
For VLS 2.0 Undermount, it's similar to Blum Movento but with a different mounting plate.
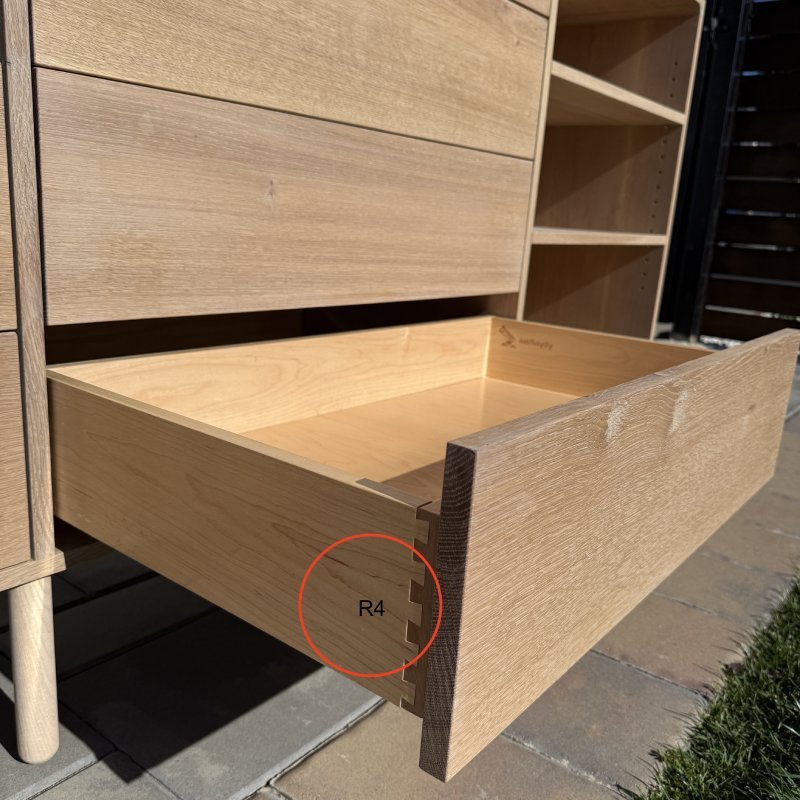
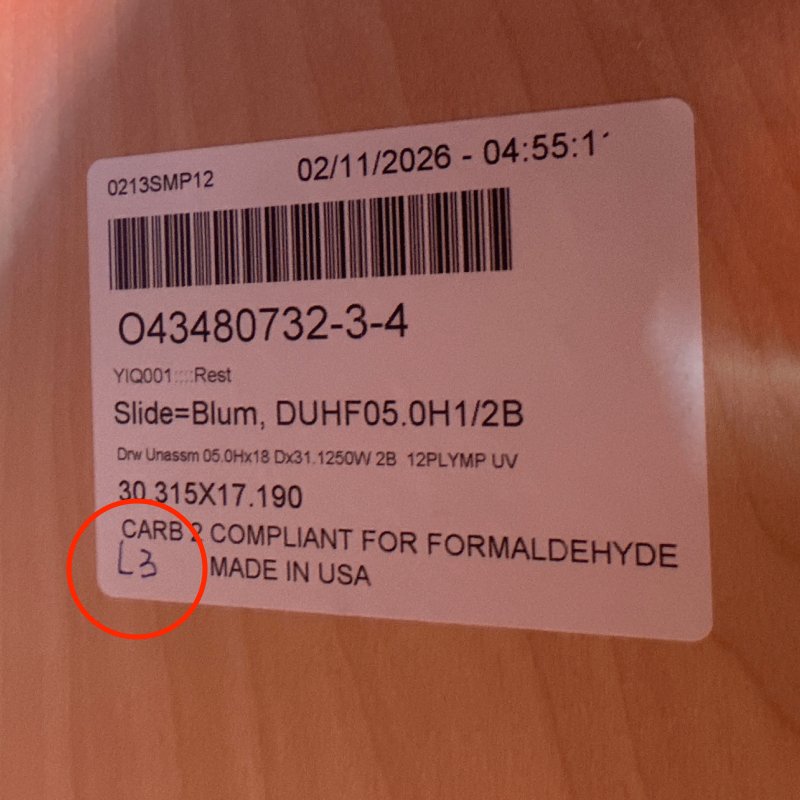
Each drawer face is individually adjusted to keep all gaps consistent and aligned. Because of this, every drawer has a dedicated position and must be returned to its original slot. The position is labeled on the side or bottom of the drawer (see photos).
- L1 = left side, top drawer
- R4 = right side, fourth drawer from the top
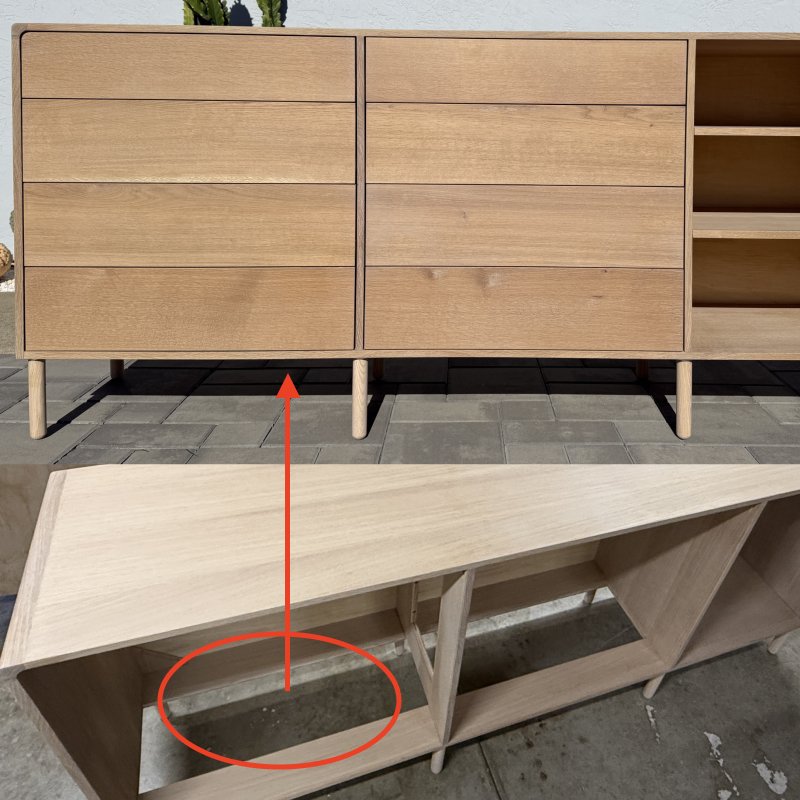
For custom drawer faces without handles, start by opening the bottom drawer first. The bottom center has an empty gap, allowing you to easily reach in and pull the drawer open.
Care & Maintenance
Maintenance
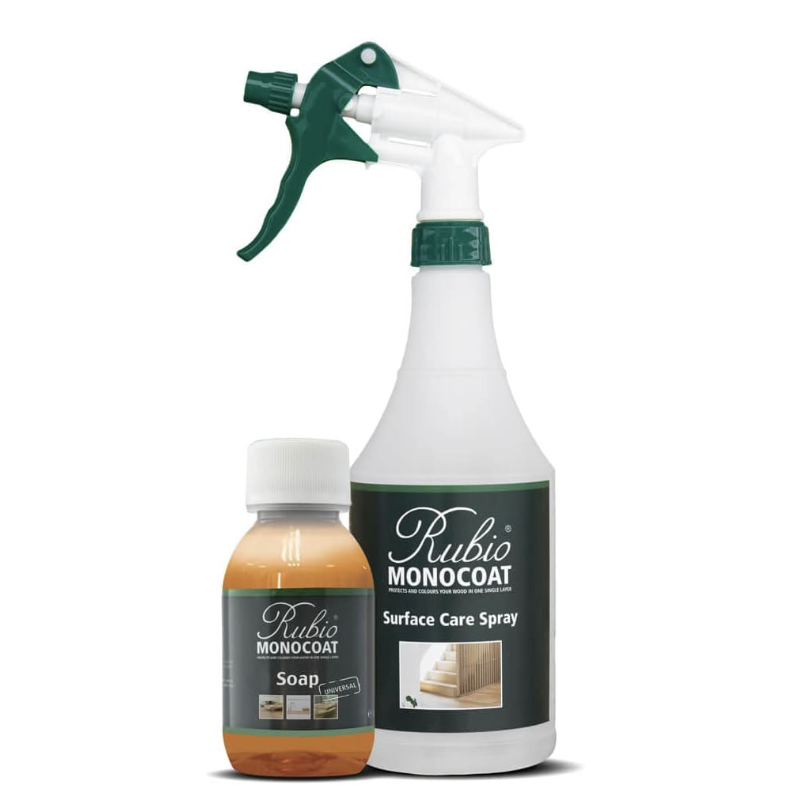
Caring for your Rubio Monocoat oil finished surface is simple, and when done properly, keeps your furniture looking beautiful for a lifetime. See the official guidelines here.
In summary, you can use the following recommendations to clean your furniture.

For any other questions, please check out the FAQ page.
Browse FAQs